
1. Tomcat 설치
1) https://tomcat.apache.org/ 접속
2) 좌측 사이드 메뉴 : Download > Tomcat 9

3) 다운로드 파일 다운
- tar.gz : 리눅스 버전
- 64-bit Windows : 윈도우 버전 - 압축 파일
- 32-bit/64-bit Windows Service Installer (pgp, sha512) : 윈도우 버전 - 직접 설치
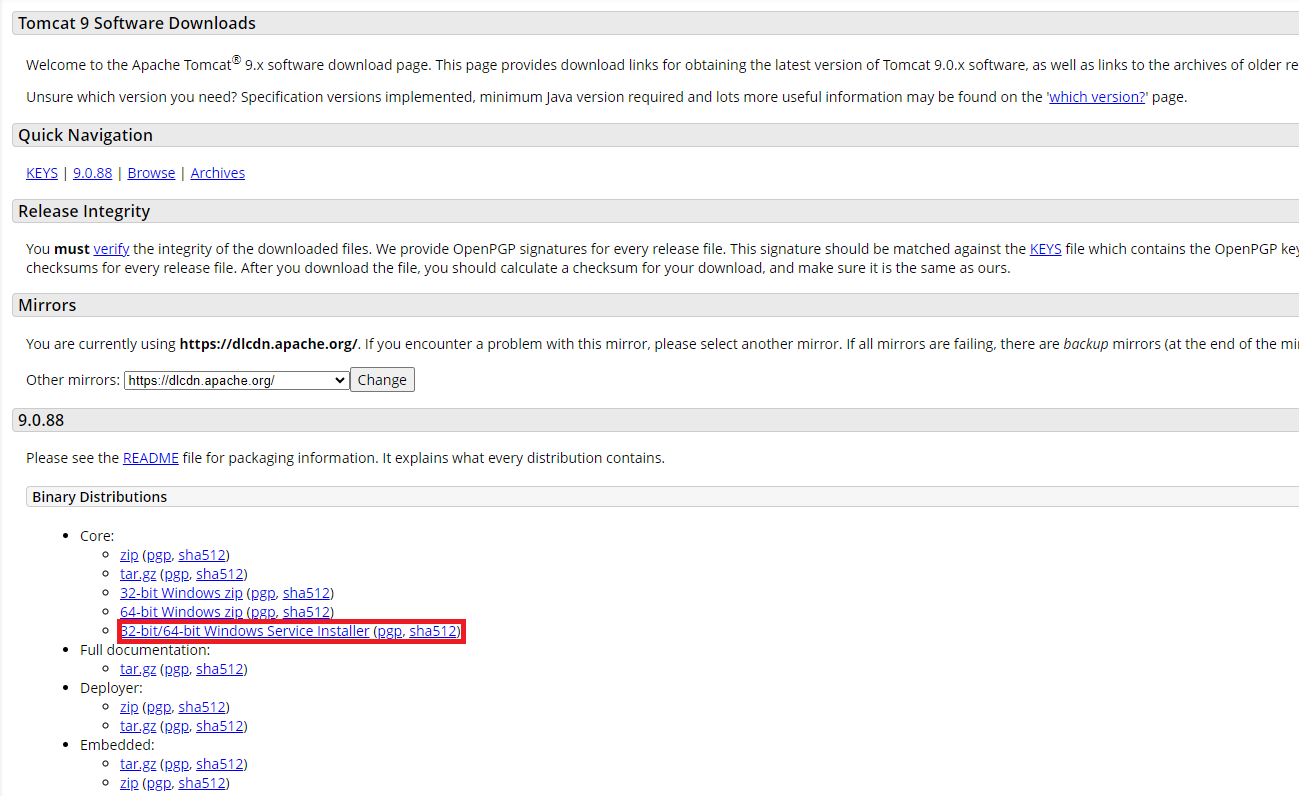
4) 설치파일 실행
- Configuration 설정 단계 : Server Shutdown Port -1에서 8005로 수정
- Destination Folder를 C:\Tomcat 9.0로 변경
- 마지막 RunApache Tomcat, Show Readme 체크 해제 후 Finish 버튼
2. Eclipse 설정
1) Eclipse 실행
2) 워크스페이스 변경 : 새폴더 study2로 설정
3) Window 메뉴 > Preferences > 왼쪽 Server > Runtime Environments > Add 버튼 > Apache선택
> Apache Tomcat v9.0 선택 > Tomcat installation directory > browse 버튼 > 왼쪽에서 C:\Tomcat 9.0 선택
> 권한 부여 창 뜨면 허용 > Finish
4) File > new > Dynamic Web project 로 프로젝트 생성
이제 앞으로 프로젝트 만들때마다 apache tomcat v9.0 , dynamic web module version 4.0으로 세팅되어있는지 확인필
5) JSP 파일 생성
- root : src > main > webapp 우클릭 > new File > new HTML FIle > hello.html
- 실행 > Apache > Tomcat v9.0 server 선택 > Always use this server when running this project 체크
6) 한글 깨짐 현상 있는 경우
- Window > Preference > General > Editor > Text Editor > Spelling > Encoding : Default (UTF-8) 적용
- Window > Preference > Web > CSS FIles > Encoding : ISO 10646/Unicode(UTF-8)
- Window > Preference > Web > HTML FIles > Encoding : ISO 10646/Unicode(UTF-8)
- Window > Preference > Web > JSP FIles > Encoding : ISO 10646/Unicode(UTF-8)
'KDT-JSP' 카테고리의 다른 글
| [DAY_31] 회원관리 (삭제, 찾기 추가) (0) | 2024.05.02 |
|---|---|
| [DAY_30] SQL - 제약조건, Sequence, CSS, 회원관리 (0) | 2024.05.01 |
| [DAY_29] DAO/DTO (학생관리, 도서관리) (0) | 2024.04.30 |
| [DAY_28] Request 객체, Response 객체, DB연결 (0) | 2024.04.29 |
| [DAY_27] HTML (0) | 2024.04.26 |